Pages

SomeBUNNY Loves You Craft

My lil’ one came down with a cold over the weekend, so I tried to lift her spirits by keeping her busy with a little Easter bunny craft. We bought this kit at Target for $5 (it came with about 8 foam eggs, lots of pre-cut foam stickers, sequins, glitter glue, etc…).
We used her hand to make the bunny with paint.  I then added the face, words, and some ribbon to the ears.  She finished it up by adding the stickers and sequins around the egg. (Don’t mind the snowman shirt and the tutu, she insists on dressing herself nowadays and this was only her fourth outfit for the day.)
Now we just need to get them all in the mail to brighten the days of some of our family!
~ Mrs. Mc

Letter Formation


My district has implemented the program Handwriting Without Tears (HWT) for students in prekindergarten through grade 1.  Some of my students still struggle with forming their letters fluently.  To provide some extra practice, I created the following documents to help them form their letters in isolation.  According to HWT, you have to start your letters “at the top” so I placed stars to remind the students where to start their letters. 
(Click on the picture below to open the link to TPT.)

Sight Words-Barrel of Monkeys-BANANAS!!

The day after I saw Mrs. Jump’s Barrel of Monkeys math activity, I walked into one of the first grade classrooms I work in and what did I see?  A huge empty pretzel container!  The teacher didn’t have a use in mind for it, but she just “couldn’t throw it away” (I think I have that problem too), so she generously let me have it and I created my own Barrel of Monkeys for a sight word game I will call, “Bananas!” 
I went to our local Parent-Teacher Store and bought pre-cut monkeys and wrote sight words on their bellies.  I added bananas to some of the monkeys without words and then laminated them all. 
I made the small red Barrel of Monkeys for my little one to practice identifying upper and lower case letters.  (I found the red container in my recycling bin that same day, placed there by Mr. Mc!  What was he thinking?!  He doesn’t have the habit of “saving” things like I do!)
This game will be played just like the game, “Bang!” Or “Oops!”  The children will take turns picking a monkey out of the barrel and reading the words.  If they pick a monkey with a banana, they will need to say, “Bananas!” and put their monkeys back in the barrel.  The goal is to have as many monkeys as you can at the end of the game.  Anna over at Crazy for First Grade created her own version called, “Tweet!” and is giving it away for free because she is almost up to 100 followers!   
~  Mrs. Mc

CVC Blending

Happy Spring! 
Although it doesn’t feel much like Spring here in the Northeast!!  Snow is in the forecast for tomorrow night againYUCK!!!
I wanted to share an activity I will be using with my K students to help them blend simple CVC words.  I am calling it, “Bloom Blending” because I found this bucket/vase/thingamajig at my grandmother’s house this weekend that says, “bloom!” right on it.  I added the word ‘blending” and decorated it with some ribbon and flowers I had leftover from some other craft projects.  (A simple pot could just as easily be transformed.)
The download includes 48 flowers, each with a simple VC or a CVC word on it.  The flowers with the white centers are easier to blend because the initial sounds are continuous.  The flowers with the yellow centers are more challenging because they mostly begin with stop consonants. 
Here is a sample of one of the pages.
You can download the entire document here.
Hope you enjoy!
~ Mrs. Mc

Letter Sound Assessment

Here is the form I use when assessing my students’ letter and sound knowledge. 

I just also added the four basic digraphs to the same form.  I start by having them go through and name the upper case letters and say each sound.  I then move on to the lower case letters.  I try to use a different color each time I assess.  This way I can use the same form and also see their progress over time.
Hope you find this useful!
~Mrs. Mc

Anecdotal Notes

The last two years I have been tweaking the form I use to record anecdotal notes on my students and I think I am finally happy with it! (Well, I haven't changed it yet since the beginning of this year at least!)  Here it is:
The top half includes two blank boxes to write notes and the bottom half includes an area to record a running record (RR).  A colleague of mine had shared a print-out of a RR for 100 words using 100 boxes. To get the student’s accuracy you would just subtract the number of errors from 100% (ex. 7 errors would equal 93%).  How easy is that?  Since I try to complete a RR on each student at least once per week, I wanted to include it on the same form as my notes.  I also document the student’s words per minute (WPM) and circle/comment about their phrasing and expression.
The bottom of the form has simple codes that I circle for each reading strategy the child uses.  My district has adopted these strategies from Donna Scanlon’s Interactive Strategies Approach (ISA).  You can read more about the ISA in a book they recently published called, Early Intervention for Reading Difficulties: The Interactive Strategies Approach (Solving Problems in the Teaching of Literacy)
Here is a list of what the codes mean:
        CP=Check the Pictures
        TS=Think about the Sounds in the word First, Last, Medial
        MS=Think of words that might Make Sense
        WP=Look for Word Families or Parts you may know.
        RP=Read Past the word
        SA=Go back to the beginning of the sentences and Start Again
        DP=Try Different Pronunciations for some of the letters.
        BW=Break the Word into smaller parts
        IC=Uses multiple strategies in an Interactive and
                Confirmatory Way

~  Mrs. Mc

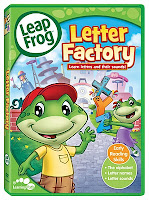
Letter-Sounds Leap Frog Letter Factory

I was recently introduced to the Letter Factory by Leap Frog.  Can I tell you how much I love it?  All of the letters are in “training”, learning how to make their correct sounds.  For example, the “A’s” are in a room and Professor Quigley comes in wearing a monster suit shouting, “Booga-booga-booga!”  All of the “A’s” shout, “aaaaaahhhh”.  The “E” is an elderly gentleman who cannot hear well and says, “eeeeeehhhh?”  I like how Leap Frog has introduced the upper case letters in a multisensory manner by allowing the child to attach the visual of the letter with its corresponding sound by a movement/action. It would be nice if the lower case letters were incorporated, but at this stage of development, I think all upper case are appropriate for my little one right now!!
I found these beautiful, printable cards for each letter from The Letter Factory on a great blog called, Running With Scissors.  Jessica handmade these and is very talented.  I thank her because my daughter loves them!!
This video also has classroom applications.  In addition to watching the entire movie, it allows you to watch each letter separately.  So along with the printable cards, I plan to bring the DVD to school to help some of my K students who are struggling to commit the more difficult sounds to memory.
~ Mrs. Mc

Chicka Chicka Boom Boom

My 3 year-old daughter really enjoys the book, Chicka Chicka Boom Boom.  So during one of the cold, snowy days of my February vacation, we decided to grow a coconut tree right in her bedroom! 
I created the coconut tree itself out of brown and green construction paper.  I then printed out the letters from Confessions of a Homeschooler and laminated them. 
She has such fun reciting the poem and making the letters climb up the tree!  It is also a great way for her to recognize letters as I name them or produce their sounds.
You can view another fabulous coconut tree at Our-Crafts-and-Things!
~  Mrs. Mc

Tic-Tac-Toe

Who likes to play Tic-Tac-Toe?  I love to!  And I also love using this game as an instructional tool for students to practice forming their letters and to write the high frequency words!!  It is not only quick and easy, but the children LOVE it!!
I like to laminate the boards I use.  I have each student or team use a different colored Vis-à-Vis marker to write their letters/words.  Three letters/words of the same color in a row is the winner!  When rinsed under water, the Vis-a-Vis marker comes right off, then I can use it again and again!

Click here for copies of the boards I created with adorable graphics from Scrappin Doodles.

Saydie

I definitely had to post something about my first born, thanks to Ladybug Teacher Files’ Linky Party.  This is Saydie, an energetic german shorthaired pointer.  Many people mistake her at first glance for a black Lab because german shorthairs are not usually solid black.  But the difference is evident when she is next to a lab, with her deep, deep chest and docked tail.
Although she still acts like a pup, she turned 6 in November.  Here is a picture from her party!
Because she is a high energy dog, we were worried about her being a little too rambunctious when my daughter was first born.  It still amazes me how Saydie seemed to just know that she needed to be gentle around P.  As you can see, they are very close.  You know that something is up when the house is very quiet and they are in another room together, because in addition to being best friends they are also partners in crime!

 ~ Mrs. Mc

Predicting Throughout the Text

Predicting:
We know that in order to predict, readers must activate their background knowledge and use it to think about what they will be reading.  I frequently use predicting throughout the reading of a text to help my students monitor their comprehension-a skill that is difficult for them.  I do this regularly with some of my 2nd and 3rd grade groups.
Here is what I do:
¹  When I preread the text we are reading together in small group, I find 2 good “stopping points” in the text.  This is usually 2-3 pages into the text and then 2-3 pages later (but not at the very end of the text).  These “stopping points” may be when an event is about to happen/change, the feelings of a character are changing, the thinking of a character is changing, etc 
¹  I then mark the page of the first stopping point with a small sticky note to help signal the students to stop reading when they get to that page.  If the book is thin enough, I may paperclip the rest of the book together, so that the students can not read ahead of the “stopping point” or see additional pictures.
¹  Once the students read to the first “stopping point” they are then presented with the prompt; “Think about the title, the pictures you have seen, and what you have read so far.  Write down 2 (or 3 depending on the text and/or group) important things you think will happen in the rest of the story.”  This prompt is adapted from the Developmental Reading Assessment-2nd Edition (DRA2). 
Click on the picture to access the link!
¹  Once all of the students are done with their writing, we then retell what was read so far and then share the predictions made and most importantly why they made those predictions.
¹  They then follow the same routine until they get to the second stopping point.  In addition, We discuss whether the first predictions were confirmed or not.

The first stopping point, provides the students with some time to learn about the characters, setting, and overall text structure.  They use this information along with what they have learned about the story events, mesh it with their background knowledge, and predict what will happen next.  Most of the time they are also inferring what a character may be thinking or feeling to help form their predictions. 
In addition to drawing on their background knowledge, predicting, and inferring, the students are also given the opportunity to practice sequencing the important details they read about while they retell the story events at each “stopping point”.  It helps the students think deeper about what they are reading because they need to monitor their comprehension throughout their reading.

Hope you find this useful!!
~ Mrs. McKown